How To Clean Thermocouple On Water Heater – Complete Guide
If your water heating system is not warming water properly, you may have a rusted or conceded thermocouple.
Keeping it clean is critical to guarantee the long-lasting operation of your device.
In this post, we’ll instruct you about how to clean thermocouple on water heater yourself.
What Is A Thermocouple?
It’s a small device adjoining the heater’s bottom.
It controls how much gas should travel through it for it to function accurately.
It utilizes a system to heat sufficient hot water for the needs of your house.
Then, it propels an electric current into the pilot light to keep it ignited.
Rust could accumulate if you don’t clean it frequently and replace it. This can lead to hazardous circumstances that could be easily evaded.
Many households have defective units because of a neglected thermocouple.
If you’re deliberating to sell your residence, running and well-maintained machines such as water heaters can increase the worth of your property.
This component typically doesn’t function alone. It works in collaboration with a device named “standing pilot,” which is a small flame that stays on when the heater is working.
When the pilot turns off, the heater stops running.
The thermocouple must be in top condition for the standing pilot to stay on.
It’s a fundamental way the sensor connected with the pilot procures an electric current to stay on.
The sensor present on the gas valve transmits a signal to the pilot to stay on.
How to replace a thermocouple features two metals that make it a probe to produce a current when two wires acquire warmth. It happens due to the Seebeck effect.
How To Clean Thermocouple On Water Heater?
Here’s a straightforward guide on how to clean thermocouple on gas heater on your own.
This can fix the issue if your pilot light turns off frequently.
1. Collect The Tools
Before you begin the cleaning procedure, you will need to collect these essential tools.
- A Screwdriver
You need to unscrew any tightened screws in the heater.
- A Multiway Wrench
It helps you unscrew all the nuts and bolts inside your appliance.
- An Emery Rag
It’s identical to a nail file, but it boasts a cloth back.
You can take advantage of it to sandpaper the thermocouple’s surface to remove any dust accumulation.
It also eliminates any oxidation seams.
- Lint-Free Fabric
You can use lint-free fabric after using the emery rag to remove all the accumulation.
It eradicates scum remaining on your thermocouple that you just cleaned.
- Steel Wool Or Fine-Grit Sandpaper
You can also use a brush as a substitute for steel wool.
It’s the last thing you will utilize to remove any residue on the thermocouple.
You can also rely on it to clean the rest of the unit construction.
2. Confirm The Thermocouple Is The Culprit
Before you start how to clean thermocouple on RV water heater process, make sure that it actually requires cleaning.
The easiest approach to figure it out is to pay particular attention to what takes place when you light the pilot.
If it lights but turns off when you release the ignition knob, the thermocouple is probably the culprit.
The pilot is not heating it adequately to maintain a strong electrical voltage to keep the gas valve open.
If the pilot light does not light or lights for a long time then turns off, there’s no issue with the thermocouple.
If you’re certain that the thermocouple requires cleaning, proceed with its cleaning process.
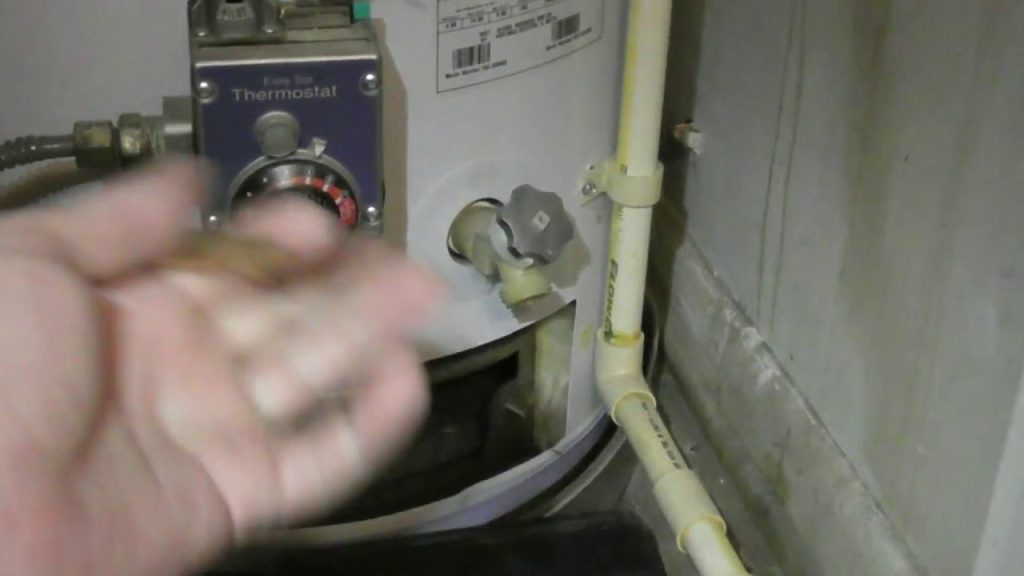
3. Turn Off The Gas
The initial step of “how to replace thermocouple on hot water heater” is to turn off the gas supply.
You can do this by switching off the gas valve on your device.
If you have an electric unit, disconnect the power supply.
It’s a standard process when you are cleaning or replacing the thermocouple.
It’s an essential protection precaution.
4. Remove The Burner
The second step of “how to clean thermocouple on water heater” is to remove the burner.
First, loosen the mounting screws if your appliance has an access lid.
Then untwist and remove the nuts that secure the burner plate.
Turn the screwdriver multiple times to untwist any strung links attaching it to other components.
If any component is wired into your control center, remove the wires as well.
Cautiously pull on any protruding connectors for this purpose.
If they don’t remove easily, put some stress onto their release levers and gently yank at each wire at the same time until they get loose from one another’s grip.
Don’t pull on them with excessive pressure or tug unnaturally because you may damage something.
Inspect the container base to check if it has a vapor sensor.
Take it off if it does. Remove the burner from your heater to access the thermocouple.
5. Sand The Thermocouple
Now, it’s time to sand the ends of the thermocouple with an emery rag to eliminate any stubborn stains you may have.
It will aid in maintaining a clean detecting region for perfect performance when heating water in the future.
Look for rust between the power wire and terminal and buff it out before the cleaning procedure.
Finish by buffing down the sanded regions with a towel to confirm everything is in good running condition.
6. Clean The Burner
The next step of “how to replace a thermocouple on a gas water heater video” is to clean the burner.
Don’t forget to clean the burner if you want to save money on monthly utility bills.
It can build up debris in its holes or ports.
So, get rid of debris with steel wool and emery cloth sandpaper.
Then, use a tiny brush to eliminate any dust that may have accumulated into those areas.
This will help in the improvement of efficiency and safety checks.
7. Fix The Burner
Put the burner into its proper place in the unit’s tank.
Make sure it’s securely balanced on its bracket for protection and stability.
Secure its plate by threading and tightening the screws or nuts.
If your heater has a vapor sensor, reconnect it first before reattaching the wires to the device’s gas valve.
Place the thermocouple in the gas valve and secure it.
Reattach the burner gas supply line and pilot light supply line to the gas valve or control center.
Swap and secure the burner access cover.
8. Activate The Water Heater
Toggle your appliance’s thermostat between 120 degrees Fahrenheit or 140 degrees Fahrenheit to keep it operating flawlessly and save money on bills.
For this purpose, shut off the power or disconnect it if there’s a cable to stop the electricity from flowing through your device while you are working with it.
Then, open up the gas supply line before activating the pilot light manually for ignition.
Don’t go higher than 160°F because higher temperatures can cause corrosion inside the heater.
This could lead to leaks in pipes and safety risks, including fires from spontaneous ignition and carbon monoxide poisoning.
What Is The Right Time To Replace A Thermocouple?
You should exchange it when the millimeter shows readings below 25 millivolts, or there’s no warm water running.
You can change it if the dirt accumulation on the thermocouple cannot be cleaned and ruins its function.
If you notice these signs, it’s the best time to replace the thermocouple.
How To Replace A Thermocouple On A Water Heater?
The thermocouple typically lasts for the long term, but they don’t last longer than the heater itself.
So, if the pilot light is lit, but the unit is not displaying it, you need to swap the thermocouple.
Take your malfunctioned thermocouple to hardware shops.
It comes in various sizes, so you will need to match your existing and new thermocouple’s size.
If you cannot determine which one you should use, ask the salesperson for help.
To remove it, loosen and detach the screws or nuts connected with the thermocouple with a wrench.
Remove the bolts and slide the thermocouple through the metal bracket that environs it.
Conclusion
It’s vital to keep your heater’s thermocouple clean to make it function properly.
Your unit is a long-term investment, so you want to confirm that everything functions correctly and lasts for the long term.
You can avoid potential problems with your machine by simply cleaning the thermocouple once or twice a year.
You can also employ expert service if you cannot do it yourself.
A dirty running heater will also have a huge impact on your monthly electricity bills due to higher usage.
So be attentive to this when you check your monthly energy expenses.
On the flip side, find out whether any regulation has been passed about the gas devices before doing anything related to them, like how to replace thermocouple on Richmond water heater and how to clean thermocouple on water heater.