How To Flush Rinnai Tankless Water Heater? Full Guide 2022
Over time, tankless water heaters may collect deposits and minerals build-up, which can erode the walls inside your container’s heating chamber.
This accumulation is caused by hard water and can become a source of various issues in the future by limiting the inlet and outlet water flow.
Therefore, you must flush your tankless machine at least once a year to maintain its top performance, efficient heating, and long life.
Luckily, flushing a Rinnai appliance is a fairly straightforward procedure. Most of the time, you need a few tools and 30 minutes to clean it.
Today, we will share a step-by-step guide on how to flush Rinnai tankless water heater yourself and save money.
Why Is Flushing Of Rinnai Tankless Water Heater Vital?
These units are affected by water quality; every water heater brand proposes regular cleaning and maintenance, where descaling is the most exhaustive.
Hard water is present in almost every house, but if you use the well water, your machine might accumulate limescale and mineral deposits on the device’s components.
Limescale and sediment accumulation is primarily a problem when water travels through the heat exchanger’s constricted water routes. It might block the component, inhibit regular heating operation, and many other complications.
Mineral buildup can create corrosion and hot spots, which will wear down the heater’s walls, decreasing the life of your heater. A heat exchanger is the most critical element in a tankless appliance.
Flushing your device whose heat exchanger is clogged by the sediment and limescale buildup is necessary. You must clean it when the manufacturer has suggested or as soon as you detect the problem.
If you don’t descale it, the issue will worsen. The latest tankless models feature sensors and a diagnostic system that reacts and warns the user when the sediment builds up.
In the case of Rinnai, you will see error codes such as “LC” or “OO” on the remote controller or display. These codes indicate that there is something wrong with the unit, and flushing is required.
If you ignore these codes, the heat exchanger can damage due to extreme temperatures because limited water flow will pass through and won’t cool the component down. Bear in mind; warranties don’t cover damages related to sediment accumulation.
Tools That You Will Need To Flush The Rinnai Heater
How To Flush Rinnai Tankless Water Heater With Vinegar?
- First and foremost, turn off the unit. This is compulsory because the device will start pumping water if the system turns on. If the machine is open when it happens, the outcomes will be a mess.
- Close the warm and cold water isolation valves and link the two water hoses on the isolation valves to the service ports to permit the vinegar solution to flow through the pipes and valves.
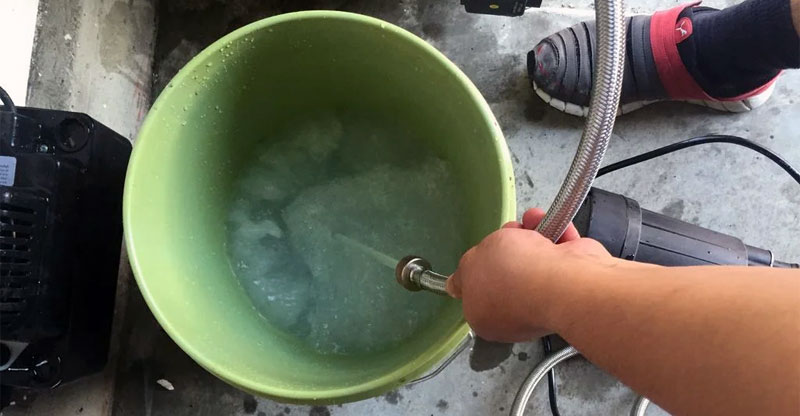
- Connect the cold side of the isolation valve to the submersible pump to bring the vinegar solution into the system continuously until the flushing process is over.
- Then, connect the hot side of the isolation valve to the discharge side with the other washer hose, emptying into the bucket. The quantity of vinegar solution pushed out of the appliance may somewhat increase than the amount poured in because it will also be eradicating the limescale and mineral deposits.
- Next, pour the vinegar into the bucket and turn on the submersible pump. This will introduce the solution in the entire tankless machine. Many tankless companies recommend descaling the unit for a minimum of 45 minutes, but you can flush it longer to get great results, especially in regions with very hard water supplies.
- If you have employed an expert plumber for the flushing job, he will perform other maintenance errands while the heater is flushing. Rinnai devices have elements such as burners, a blower fan, and the fins on the heat exchanger. It is mandatory to maintain them because these elements collect dirt and grime due to the common location inside a garage.
- After flushing the heater, throw away the discharged solution. You can use the bucket with a lid for this purpose. After shifting the discharged solution into the bucket, close and seal it using the lid. You must seal it because some towns regulate the disposal of wastes from water heaters and water conditioners, so the discharged solution may need to be transported. You should research the local requirement before flushing your unit.
- Now, you can flush the residual vinegar from your system. This time put 4 gallons of freshwater inside the bucket with the submersible pump. The water will be pumped through the unit and into the 3rd discharge bucket. The amount of freshwater put in should be closer to the quantity discharged as the Rinnai heater should be free of limescale and mineral accumulation.
- Now, it’s time to shut off the circulation pump and close the service port onto the cold inlet. Then, detach the washer hose from the service port to restore the cold water circulation into the device.
- The final step of “how to flush Rinnai tankless water heater with vinegar” is to close the service port, disengage the washer hose, and open the isolation valve. Next, open the cold inlet valve to permit the fresh water to clean the heater a third time, but don’t collect the water this time.
How To Clean Rinnai Tankless Water Heater?
Rinnai tankless water heaters are easier to maintain, but we would advise you to follow the instructions carefully when it comes to cleaning. Here’s how to descale a Rinnai tankless water heater:
Turn Off The Power Source
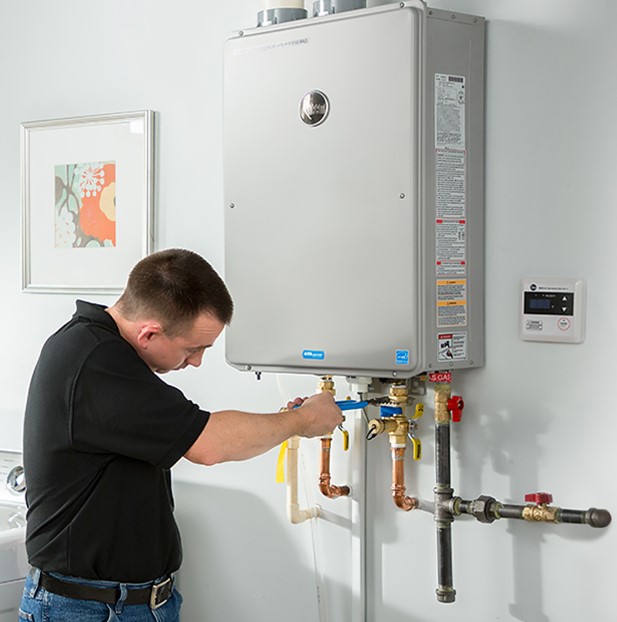
To start the process, the fundamental step is to shut off the tankless unit. If you have an electric appliance, shut off the circuit breaker, whereas if you have a gas device, turn off the main gas supply.
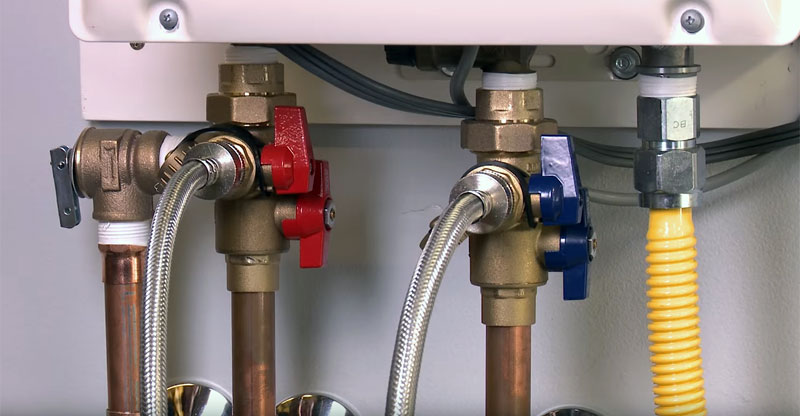
Shut Off The Water Valves
Three water valves are linked with your appliance. The three valves are: one for hot water (red valve), one for cold water (blue valve), and the last one is the main valve supplying the water into your residence.
The cold water should not go into the device while you are flushing it. Furthermore, hot water should also not come out of the heater.
Examine The Purge Port Valve Caps
Now, check the purge valves and ensure they have small handles, looking like the letter “T.” Remove the caps slowly from the purge valves to release the pressure built inside the pipes.
This step will also decrease the hazard of warm water coming out unexpectedly while descaling. Anticipate some pressure as you are removing the caps. Once again, make sure the hot water valve is completely turned off.
Manage the caps cautiously so that you don’t move the rubber sealing discs because they are imperative for the valves to function appropriately.
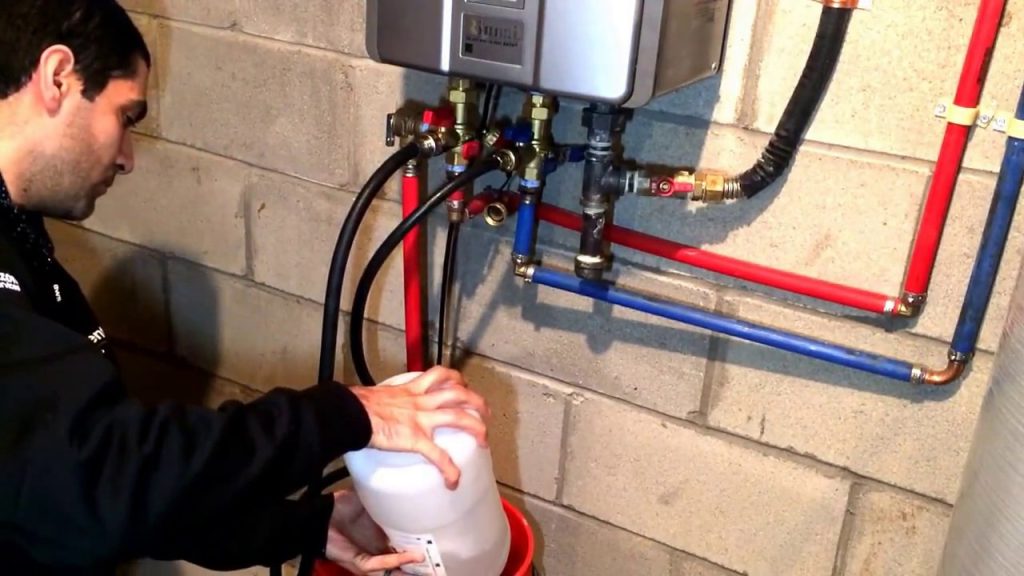
Attach The Hosing Lines To All Valves
Not all brands provide hosing lines with the devices, but you can easily find them in the home repair and water heater shops.
The hosing line should reach between the unit and the bucket. Read the user manual or contact the manufacturer directly to learn how to clean filter on Rinnai tankless water heater.
Sometimes, a sump pump will aid in linking the hoses to discharge. You may impeccably clean the water from both the hot and cold water valves.
Also, make sure to open the purge port valves. It’s very easy to do, and you simply have to rotate them perpendicularly to the position of hot and cold water valves.
Clean The Unit
You can use undiluted white vinegar to clean the unit. Four gallons of vinegar will be more than enough. Don’t use chemical solutions because they are harmful to your health.
Check The User Manual
To learn how to drain a Rinnai tankless water heater and how often should a tankless water heater be flushed, you should check the user manual again.
Rinnai heaters are different from other devices available out there, so they have different requirements for draining and cleaning. Usually, their cleaning process is 45 minutes long.
Close The Purge Port Valves
You need to rotate the handles to close the purge port valves when the flushing is finished. Disengage and put every hosing line away from the valves.
Also, place the purge valve caps back onto the pipes. Tighten the caps firmly, but don’t over-tight them because you don’t want to damage rubber sealing discs inside them.
Turn On The Heater
Check the user manual once again to see exact guidelines on the correct approach to turn on the heater.
You may only have to twist and open the hot and cold water valves in some cases. Make sure they are parallel to the position of the main valve.
Finish The Cleaning Process
Choose a fixture inside your residence and turn on the warm water. Allow the air to go through the pipe.
Allow it to run until it regularly runs with no air going through anymore. If you hear a gentle sputtering sound, it means everything is fine now.
What Does A Tankless Heater Flush Cost?
How to flush Rinnai tankless water heater with vinegar may cost up to $150. If you use well water with heaps of iron, you should flush it twice a year. The descaling process will take approximately 30 minutes.
If you want to save money on heater flushing, you can sign an annual service plan. You may have to pay a few extra dollars, but you will acquire more benefits and services for the whole year.
Conclusion
Flushing a tankless device is quite easy. You don’t need special tools or training to do this job successfully.
However, the most significant thing that you need to remember is to ensure you have the correct tools, follow the manufacturer’s guidelines, and above all, be safe.