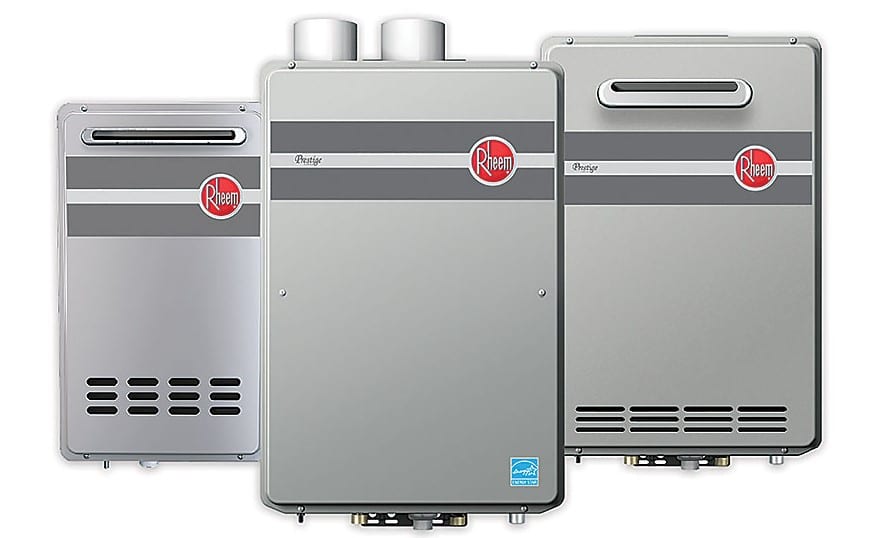
Rheem is one of the dependable and trustworthy brands globally when it comes to delivering cost-effective and durable home care solutions to millions of domestic and commercial properties worldwide.
Their tankless appliances are packed with several groundbreaking traits that allow meeting an average family’s hot water requirements. However, since it is an electronic machine, you may experience some technical difficulties at some point in time.
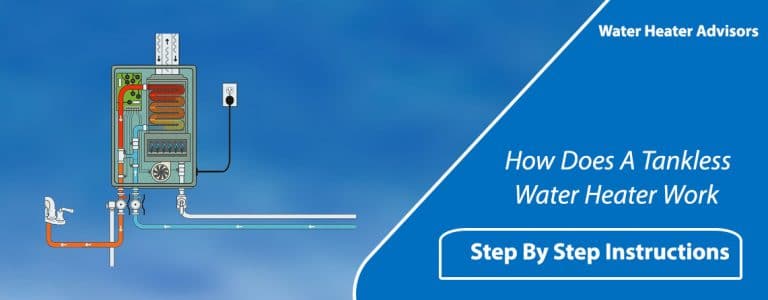
Nowadays, all heaters use the computer board that tracks the heating process, regulate the parameters, and assist you in troubleshooting the potential malfunctions.
Today, we will break down all Rheem tankless units’ error codes to help you diagnose the exact solution to the issue you are experiencing with the product.
Rheem Tankless Water Heaters Error Codes Breakdown
Error Code: No Code
It occurs when the water flow rate is extremely low. The electronic control board will display the current temperature, but the unit is not working at all.
Solution
Initially, fine-tune the water flow or temperature. Then, check all the pipelines for both the hot and warm water and confirm the lines don’t cross.
Also, make sure that there are no plumbing or technical problems such as crossovers.
Now, remove the filter and wash it to eliminate sediment jammed in the inlet that is producing problems.
Ultimately, check the flow sensor and ensure it is operating correctly. There are greater odds that you may find several problems with it, or it may be congested.
Error Code P1
Rheem tankless water heater error codes P1 indicates that the water flow rate is too low, but the device is still working.
Solution
Primarily, check the water pressure from the hot water fixture. If you notice it is low, you may have to clean it.
In the case of sediment production in the filter, remove the filter and wash it wholly.
Once you are done, regulate the temperature or flow rate of the machine. Try to increase or decrease it to see if it works.
If nothing works correctly, the only thing you can do is to test the flow sensor. Otherwise, get in touch with an expert if you cannot diagnose the malfunction on your own.
Error Code 1L
It informs you that there’s an accumulation of limescale and scale deposits. This code indicates that it’s time to clean the device.
Solution
First of all, flush the heat exchanger by consulting the user’s manual provided by the manufacturer. Then, adjust the altitude settings. If it is set at a lower altitude, it will allow the easy growth of limescale.
Error Code 05
This code indicates that maybe the vent exhaust or air intake is blocked. Perhaps, the pipes are not appropriately attached to the vent thermal. In both cases, the heater will still work.
Solution
If the vent is not installed correctly, you should check for its fittings. If you see spare parts as loose, connect them to make them sit firmly.
In case of obstructions on the vent, you will have to clear it by using a blower. All the dirt particles must be removed. Now, deploy it back by following the installation instructions. Make sure it sits appropriately onto the tankless system.
Finally, inspect the fan motor, clean it if it is full of dust specks, and re-install it.
Error Code 10
It specifies that a false flame has been sensed. You may want to call a specialist to grab information about how to reset Rheem hot water heater; there are a few things you can do first:
Solution
First of all, inspect all the vents are correctly linked, and there are no blockages, and the right materials were utilized during deployment.
Now, check the flue inlet and exhaust termination and ensure they are free of blockages and have sufficient clearance space.
Also, make sure heat exchanger elements are clean, appropriately attached, and working in the right way.
Error Code 11
When your system displays this error code, it means the ignition has failed. Numerous reasons could cause this code to appear. It is better to call a professional plumber for Rheem tankless water heater error code 11 fix.
Solution
Inspect to confirm that your device is grounded, and the gas line, meter, and valves are fully turned on. It must have the proper gas volume and pressure. In the end, test the igniter to make sure it is fully functional.
Error Code 12
This code means that the unit cannot maintain a flame. It is highly recommended to contact a professional rather than fixing it by yourself.
Solution
Inspect all the valves are open, and the heater is receiving the required type and pressure of the gas. Examine the flame rod to make sure it is joined and free of carbon collection. Detach all wirings, PC board, and remote control, and then reconnect.
See if proper venting materials and condensation collar was deployed. The gas line, meter, and regulators all should work correctly. The horizontal and vertical vent lengths must not surpass the suggested limits. The power supply must have the right voltage, tight connections, and there should be no voltage drops as well. Ultimately, eliminate any air from gas lines and then inspect the gas solenoid valves for short circuits.
Error Code 13
The Rheem tankless water heater error code 13 indicates the poor or improper combustion.
Solution
First of all, check the air intake and exhaust venting to know if they meet the installation requirements and working correctly. Consult your user’s manual for this purpose.
Now, remove all the blockages from the vents and where it ends outside.
Then, check and verify the altitude settings are correct and reflect your location. Again, read the user’s manual.
Now, examine the flame rod to ensure it is operating as it should. Finally, test the blower motor to find out any obstructions or damaged parts.
Error Code 14
It tells you about the glitch in the overheat wrap.
Solution
Examine and confirm that the right type of gas is being utilized, and the high and low fire manifold pressures are also accurate. Then, test the heat exchanger for separations or cracks.
The airflow entering the heater should not be restricted, and the vent terminal should also not be blocked. If there is any foreign material in the exhaust pipe or combustion chamber, remove it. In the end, you have to Ohm out the heater’s safety circuit.
Error Code 15
It interprets that the heat exchanger has exceeded a temperature of 207° for more than 15 seconds. It is basically a boiling safety warning.
Solution
Check and ensure that the tankless device’s cold water inlet pipe and the inlet valve are fully open. Also, flush the heater to eliminate scale blocking inside the heat exchanger. Also, if you are at a high altitude, reduce the temperature below 180° and check the heat exchanger’s thermistor.
Error Code 16
This code means that the outlet water temperature has exceeded the preset thermostat setting.
Solution
Examine the heat exchanger for obstacles or scale build-up. Ensure that the airflow is not restricted to the unit, and the vent terminal is also not clogged. Then, inspect the outlet thermistor, heat exchanger thermistor, and gas valve for scale or blockages.
Error Code 21
This code interprets that there is something wrong with the air intake filter switch.
Solution
Inspect to ensure the air filter door is placed correctly and the front panel is appropriately deployed.
Error Code 29
If you see this error code on the machine’s display screen, it indicates that the heat exchanger’s output temperature is too low, or the neutralizer is blocked on a condensing heater.
Solution
First of all, clean the air inlet screen and fins on the heat exchanger.
Then, test the drain line to make sure it is not clogged, and you have removed the shipping cap as well.
Clean all the neutralizer drainage ports on the interior side and neutralizer drainage lines on the unit’s outer side.
Error Code 33
It tells us that there is a problem with the outgoing water temperature sensor.
Solution
You will have to examine the thermistor wiring to ensure there is no damage. Also, check the thermistor for any limescale build-up and clean it if required. Then, Ohm it. If the error still exists, replace the sensor.
Error Code 34
This error code informs you about the fault in the combustion air temperature sensor.
Solution
Examine the thermistor wiring for any kind of damage and clean and Ohm the thermistor.
Then, clear any blockages from the vent terminal and ensure airflow is not restricted around the heater.
Finally, you have to inspect the fan blade to make sure it is attached firmly to the motor shaft and spins freely. Ohm out the sensor and replace it if needed.
Error Code 51
When you see this error code, it becomes necessary to learn how to reset Rheem tankless water heater. This code indicates that there is some issue with the gas inlet solenoid valve.
Solution
Examine the gas control valve wiring harness for any loose or damaged terminals and Ohm it out after consulting the user’s manual. It is highly recommended to call a professional when this error occurs.
Error Code 61
It tells you that the combustion fan is not spinning correctly.
Solution
First of all, check the fan motor and ensure it is turning correctly and freely. The motor will still work in case of any restriction. Look for any loose or damaged connections on the motor wiring harness.
Error Code 72
It interprets that there is a problem with the flame sensing device.
Solution
Check and ensure the flame rod is touching the flame when the heater fires. The wiring should not be damaged and also provide the required voltage.
Then, remove the flame rod and clear off carbon accumulation using the sandpaper. Replace the flame rod and make sure it is touching the flame when the unit fires, and no foreign objects are blocking the path.
Error Code 76
It shows that the tankless heater is not communicating appropriately with the remote control.
Solution
First of all, examine the remote control’s wiring and find out the loose or damaged connections. If there is any faulty cable, you can terminate it and hook the remote control directly to the terminal on the PCB.
If the problem is still not solved, you might have to replace the PCB or remote control.
Error Code 79
When this code appears, it informs that there is some problem with the fan motor’s current. Your best bet is to get in touch with an experienced plumber, but if you want, you can follow these steps:
Solution
First of all, ensure the fan motor is turning freely and getting the proper voltage. A small amount of restriction will still allow it to function freely.
Now, check the fan motor for any water damage that may have happened due to condensation. In the worst situation, you may need to replace the fan motor or PCB.
Error Code 99
It indicates that the heater’s flue is blocked.
Solution
Check the vents, exhaust flue, heat exchanger, combustion fan, and inlet filter for blockages.
Conclusion:
Rheem tankless water heaters are equipped with a digital display screen that includes a long list of error codes. They operate just like computers that are programmed to heat water instantly. Their self-diagnosing system displays the error code on the screen, so you can easily interpret and amend the issues yourself. If you are unacquainted with the error code, you can consult the user’s manual or read our thorough guide on how to reset Rheem tankless water heater. Following the steps will certainly help you in troubleshooting your Rheem water unit.
Do you like cold or scorching hot showers? Possibly you like lukewarm water? Many homeowners may not often deliberate about their tankless water heater, but it plays a significant role in your residence’s plumbing. An ill-functioning water heating system could be the biggest cause of hefty electricity and water bills. Thus, it is critical to…
One of the most critical things in deploying a tankless device is how to vent tankless water heater. Correct venting of a water heating system can guarantee efficient performance and increase the lifespan of your appliance. Selecting the tankless route for your family’s hot water needs certainly comes with countless benefits –like saving utility bills…
What are the cons of a tankless water heater? It is that time again, and you are going to be purchasing a water heater. You have heard the rants and raves of tankless water heaters being so much more efficient, cost effective, and easier to maintain. Cons Of a Tankless Water Heater? While we love…
Are you tired of running out of hot water while enjoying a shower, washing dishes, or doing laundry? There’s no need to feel annoyed anymore because nowadays, compact and ultra-efficient tankless water heaters are available that promise to provide a limitless and on-demand stream of hot water. They are swiftly gaining popularity and for a…
Is your water heater not working properly or displaying an odd number on display, but you don’t know what it means? Do you want to know how to reset Navien tankless water heater? If so, this guide is for you. Like any other home appliance, your tankless water heater will surprise you with an unexpected…
It is common for a hot water heater to leak from the bottom, but the water heater leaking from the top is not that usual. That is because sediments accumulate at the bottom, where they corrode the container until holes or cracks manifest. Drain valves also leak frequently. A unit leaking from the top is…