How To Test The Water Heater Element – Complete Step By Step Guide 2021
Tankless water heaters are a vital home appliance that produces warm water for our bathrooms, sinks, washing machines, and dishwashers. If your unit is generating lukewarm water, try to increase the temperature. Various factors can disturb the effective operation of the water heating system; a damaged or faulty heating component is one of the most common reasons.
Though you can hire an expert plumber to identify and fix the problems, it will cost you approximately $75 to $250. Therefore, you should educate yourself on how to test the water heater element and replace the broken ones.
To test a damaged heating component, you will need to turn off the electricity to a tankless appliance and take away the heating elements’ covers. Then, you will need to inspect the component for continuity; it means you will have to check if the electric current pauses between two connection points. If the continuity is paused, the heating component needs to be replaced.
But, before jumping into details, let’s understand what the heating element is and how does it work? Furthermore, in this article, we will also guide you step by step on how to test hot water heater element with digital multimeter and water heater element ohms chart with zero knowledge of electrical works.
What Is A Water Heating Element?
They are usually manufactured of good conductors of electricity. To make metal elements, nichrome is used, which is a combination of chromium and nickel. Electric devices are outfitted with one or four heating components. Bigger machines may have more, but it is very rare.
They are liable for transmitting electricity through them and heating the cold water. These elements are placed at the bottom and top of the heater. Normally, the one that is located at the bottom rusts and needs to get replaced. Still, it is critical to inspect all the heating elements to confirm they are functioning correctly.
How Do The Heating Elements Function?
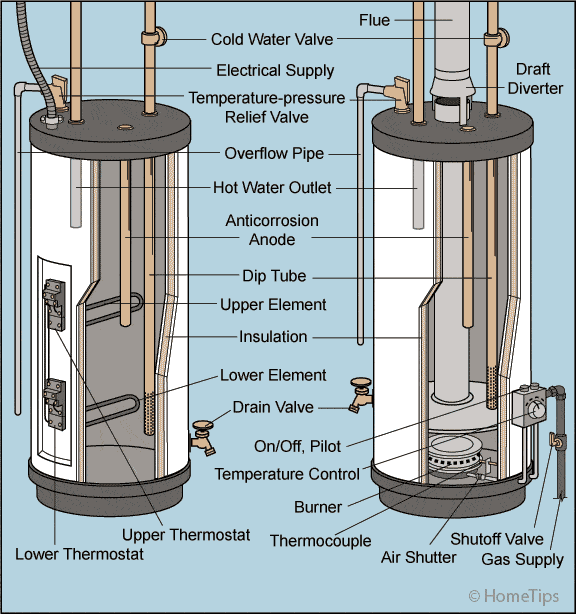
Nowadays, many tankless units feature two heating components: the lower one and the upper one. Both of them have their own thermostats that control them. In most cases, the lower one is the troublemaker when your appliance is producing lukewarm water or runs out of hot water faster.
However, if it is not creating hot water at all, then the upper component is the culprit. When the upper one stops working, the lower one will also stop operating regardless of whether it is in good condition or not.
The reason is, the thermostat connected to the heating element on the top also controls power to the thermostat and the heating element at the bottom. As either component can be the perpetrator, so you will have to how to test the electric water heater element to be sure.
Major Reasons For Water Heating Element Failure
Things You Will Need To Test The Heating Element
Equipment
Materials
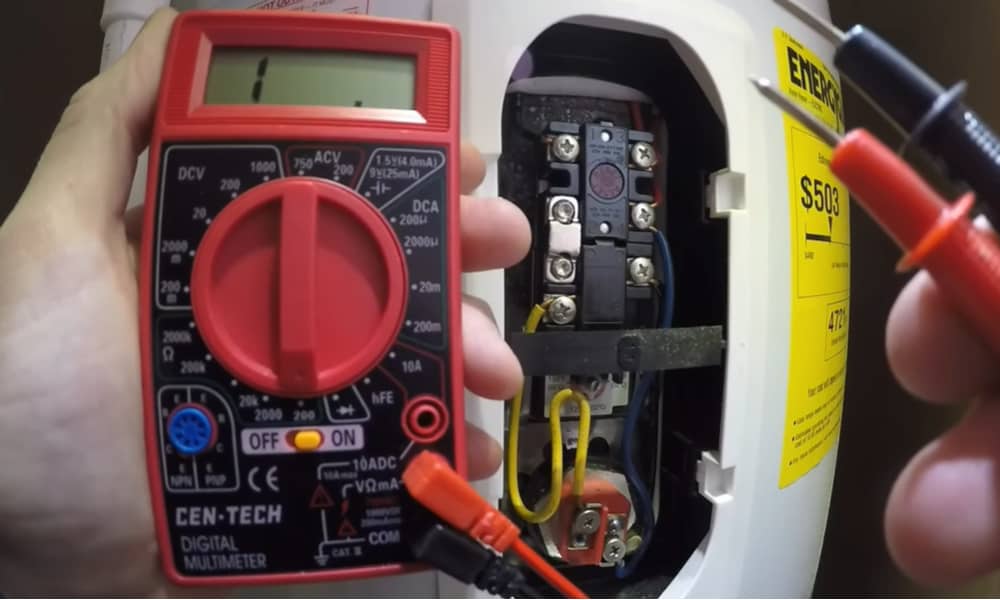
Steps On How To Test Water Heater Element With Continuity Tester
Shut The Breaker Off
It is the most significant step in testing your heating element. Pinpoint the breaker at the main electric board that is attached to your unit. You will be able to find it in the metal box on the wall. You will get shocked if you will get into interaction with the electric current.
On the electric board, you will see several breakers with the names of the gadgets they power. Look for the one named “water heater” and shut it off. If you don’t know which breaker works for your device, simply switch off the entire power source to guarantee your protection.
Release The Panels
Open the metal box cover. There you will see two panels located on the water heater boiler’s side. Small devices normally have one panel. But the larger ones have two or more panels.
They are held in place with screws. Unscrew the metal plate using a screwdriver and make sure they don’t fall off to small areas within your residence.
Take Away The Insulation
After releasing the panels, you will need to remove the insulation on the heating components. All water heaters have different insulation materials, depending on their ages. Fiberglass is used in older units, but the modern ones have tight-fitting foams and thicker foams.
Remove the insulation and put it aside. Make sure to wear your gloves and goggles while disengaging it. Then, examine the thermostat to see if it has a plastic cover or not. If yes, remove the plastic cover too.
Confirm That The Electricity Is Off
You must double-check to make sure that the electricity is not flowing through your unit. To check this, you can rely on the noncontact voltage detector, a tool that helps you check the voltage flow in any entity without interacting with it.
Place it near to the wire that links the thermostat and heating component. If you see flashes of light or hear a beeping sound, it means the power is still present. The power must be completely detached, so that you can go ahead and how to test a water heater element with a multimeter.
Disconnect The Wires Of The Heating Element
You need to check if the heating element’s wires are melted or burned. By just smelling or seeing, you can determine if they are burned or melted. If there is a melted or burned wire, replace it.
Loosen The Screws
Now, it’s the right time to loosen up the heating element’s screws. Use the screwdriver to loosen them and then, take away the wires from the screws as well.
Once you are done with loosening the screws, note the heating component’s wattage value. It can be found on the component’s side. The wattage value is required to test the heater’s heating element.
How Do You Test A Water Heater Element
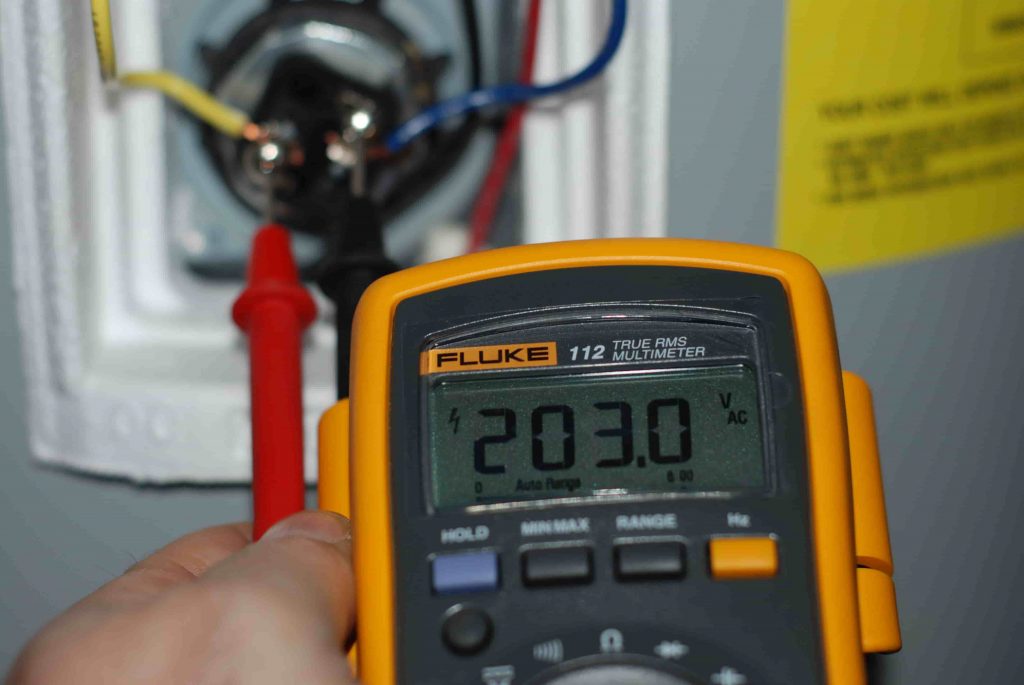
Take the multimeter and check its register to know whether your heating element is good or bad. For this purpose, fine-tune the knob of the meter to Rx1k (resistance X 1,000 ohms).
Then, one screw terminal will be attached to the red lead and the other screw terminal will be connected to the black lead. If the multimeter does not register any reading, it means the voltage is not flowing. But, if it registers any reading, it means it is working appropriately. The issue may be with the other heating component or any of the thermostats.
The Second Test
If you are not satisfied with the first test, then you can try to test it once again. For the second time, attach the red lead with one screw of the element and the black lead with the metal base of the heating component. If the multimeter’s needle moves, it indicates that the element is faulty and needs to be replaced.
The Third Test
In the third test, you can attach the red lead to one screw of the heating element and the black lead with any metal area of the device. If the needle moves, it means the element is malfunctioned and needs to be replaced.
The needle moving indicates that the voltage is flowing through the heating element and has not stopped operating. If it does not move, it indicates that the electricity is not flowing through it properly.
Reconnect The Detached Parts
Now, you have to reattach the wire to the surface of the heating component. Also, cover the uncovered panel, put the plastic cover back to the thermostat, and reinstall the screws.
Don’t forget to fix the insulation and activate the breaker. The water heater will take some time to heat the water if you have replaced a broken or damaged heating element.
Conclusion
It can be risky for inexperienced folks to test and replace the water heater heating element. But, we are hopeful that by following our step-by-step guide on how to test water heater element, you can troubleshoot a problem in the essential home appliance.
Before starting the testing process, make sure you have all the important tools and are wearing your goggles and gloves. If you can handle this task and want to save your money, then go ahead, otherwise, you would recommend hiring expert services.

