How To Test Water Heater Thermostat? Comprehensive Guide 2021
A faulty tankless water heater can cost you a fortune. Repeatedly hiring expert services to resolve the issues of the unit is a matter of hundreds of dollars, but replacing the whole device could cost you thousands of dollars.
But, if you inspect with extraordinary attention to detail, you may end up saving a considerable amount of money. Do you know what the most significant component of the water heater is? It’s the thermostat.
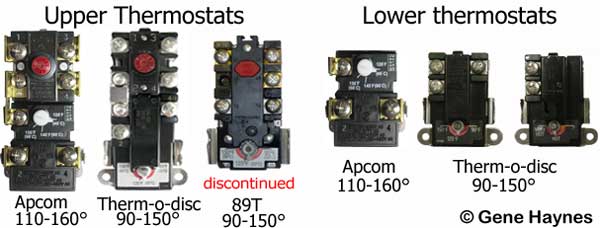
All electric machines feature two thermostats—one is located at the bottom while the other one is positioned at the top. Each one of them is responsible for controlling two different heating components.
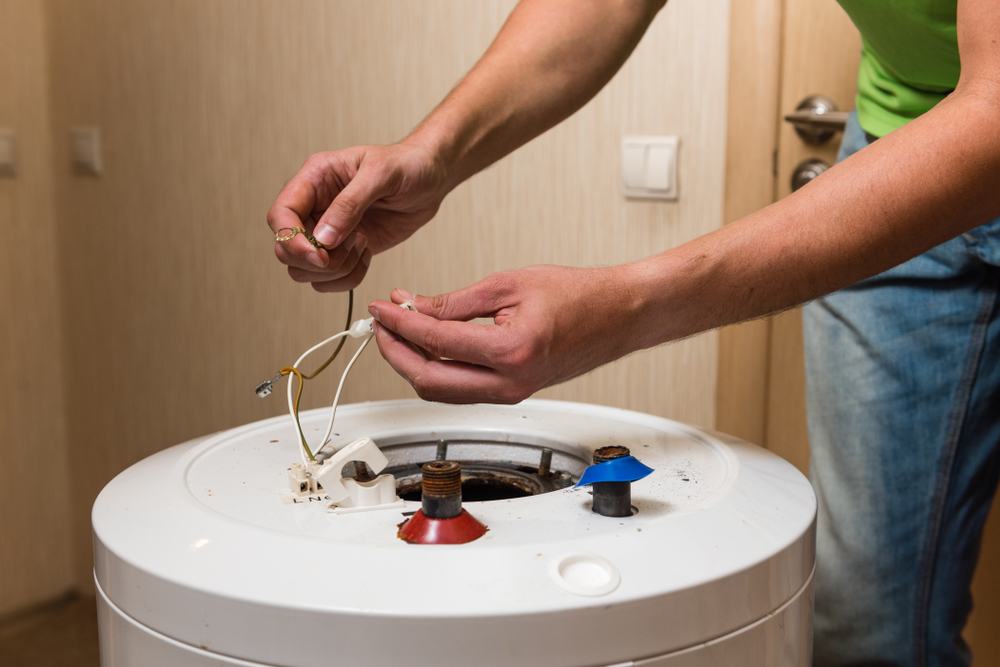
If you activate the warm water faucet and cold water comes out, then the upper thermostat has malfunctioned. However, if hot water runs out but later becomes cold, then the lower thermostat could be the issue.
But, how will you figure out which thermostat is faulty without testing it? This is where thermostat and water heater element ohms chart reading is effective.
You will need to learn how to test water heater thermostat to be able to determine what part is damaged.
In this guide, we will give you practical guidelines on how to test electric water heater thermostat and replace it if required. So, let’s get started.
How Does The Thermostat Work?
If you are noticing that your device is not creating hot water or not working properly as it should, then there is something wrong with the thermostat.
If you don’t want to replace the entire unit, then you should replace the malfunctioned thermostat. The thermostat replacement will take only a few minutes.
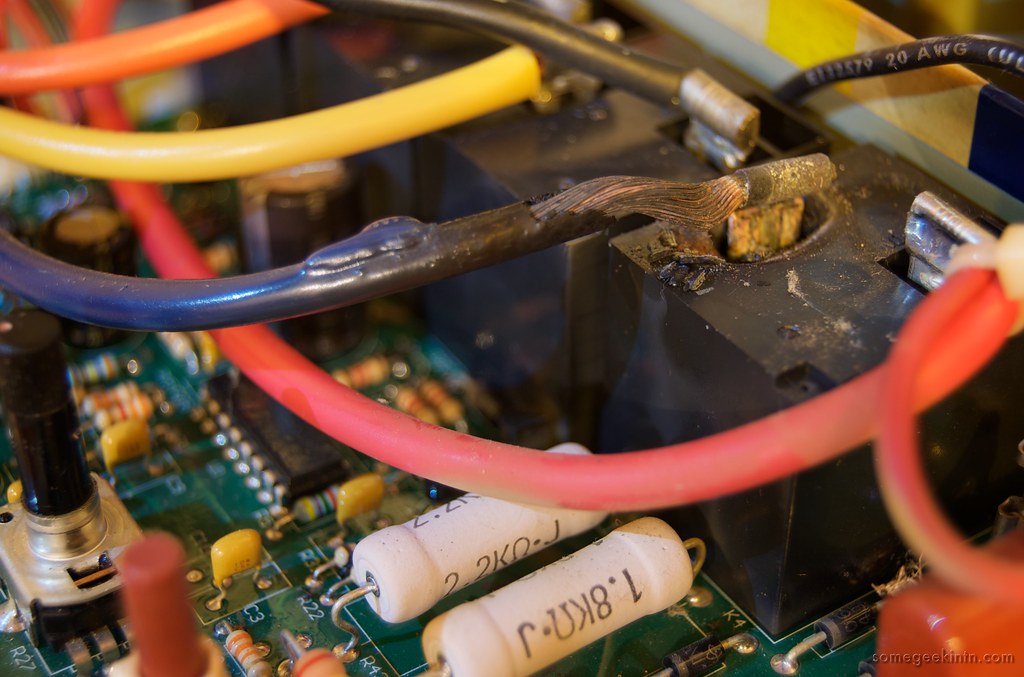
They work by opening and terminating connections that permit the current to travel to the heating components. The heating components work occasionally depending on demand.
Nowadays, water heating appliances come with two heating components and for each element, they have two thermostats. The top thermostat is bigger and regulates the bottom thermostat.
When the heating element of the thermostat on the top stops working, the heater stops generating warm water.
However, on the other hand, when the thermostat or heating element on the bottom stops working, the thermostat and heating component on the top will continue to produce warm water, but the water will run out quickly or will be lukewarm.
Important Things You Need To Know About The Working Of The Thermostat
Important Tools You Will Need For Testing Water Heater Thermostat
How To Test Water Heater Thermostat?
To check if the thermostat has failed or not, you need to follow these steps.
Shut Off The Power
Go to the main circuit box and shut off the breaker of your water heating system. Pinpoint the breaker inside the panel box named “water heater” and shut it off.
Take Out The Access Covers
To take out both thermostats outside access panels, you will need to rely on a flathead screwdriver or ¼ inch nut driver. They are positioned on the unit’s side. You will also see an electrical warning label attached to them.
Remove The Insulation
Remove any insulation over the thermostat and the heating component. Be careful not to pull any naked wires while removing the insulation as it could be dangerous.
Make Sure Current Is Not Flowing Through Your Heater
Before moving forward on how to check thermostat on hot water heater, make sure the current is not flowing to your unit. If you want, you can also take advantage of the voltage stick to confirm the power is off.
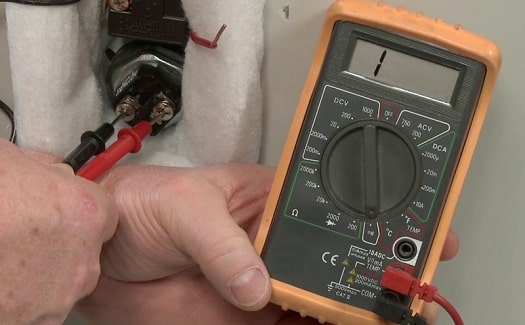
Touch the top of the legs simultaneously with the help of multimeter connections. The meter reading must be “zero”. With the black lead touching the device, touch each leg to make sure there is no current.
Examine The High Limit Reset Knob
Now, you have to examine the high limit reset knob to determine if it is stumbled or not. It trips if the thermostat connections have merged closed, the thermostat is out of tuning, or the heating component is damaged or malfunctioned.
Detach The Wires
Take a photo of wires to provide reference if required to pinpoint which wires are linked to which terminal using your cellphone. Disengage the wires to all terminals on the thermostat with the help of a screwdriver.
Test The Thermostat Using An Analog Or Digital Multimeter
The last step of how to check thermostat on water heater is to check the thermostat with a multimeter.
Take an analog multimeter and adjust it to the lowest ohms of resistance. Adjust the needle to “zero” and pinch the probes together to standardize the meter.
Now, set the digital multimeter to the lowest ohms of resistance. Take the meter’s black lead and put it on the screw terminal’s left side. Take the red lead and put it on the terminal’s other left side.
The meter reading will be close to “0” if the terminal has continuity. However, if it does not have continuity, it is obvious that the top thermostat is damaged and needs to be replaced.
This procedure should be repeated for the terminals of the right side and heating element. After examining if the top thermostat is in good condition, you will have to repeat the same procedure for the bottom heating component and thermostat as well.
Once you have successfully finished the thermostat testing, you can rejoin the wires and put the access panels back. If both of your thermostats don’t need replacement, you can test electric water heater element.
How To Replace The Water Heater Thermostat?
Once you have figured out your thermostat is out of order, it’s time to begin the elimination process.
Shut Off The Power
Before touching your water heater with bare hands, make sure electricity is not flowing through your heater. Detach the power supply.
Then, cut off the electricity supply from the circuit breaker using a screwdriver. Before replacing the thermostat, you must remove the panel.
Pull The Thermostat Out
The next step of the electric water heater thermostat test is to pull the thermostat out of the device.
But, before doing this, don’t forget to capture an image of the wires and the configuration because it will aid you to re-deploy the new thermostat. Unscrew all the tightening to remove the thermostat by applying a minimum force.
Exchange The Faulty Thermostat With The New One
We are assuming that you already have the new thermostat and now you are fully prepared to install it.
To deploy the new thermostat to the exact location, you will need to follow the same process. If you get confused about how to attach the wires, take help from the picture that you have clicked earlier.
Reconnect The Circuit Breaker
Once you have installed the new thermostat successfully, it’s time to reconnect the circuit breaker.
Turn on the tankless machine for about 2 to 3 hours and modify the knob settings to a decent temperature. Activate the high temperature tap to check if it is functioning appropriately or not.
Conclusion
A thermostat is an important element of an electric tankless water heater. When it is damaged, you may have to tolerate chilly water in your fixtures before it is repaired.
Luckily, they are affordable and can be fixed easily. Our step-by-step guide will help you how to test the water heater thermostat and replace it.


![How To Clean Sediment From Water Lines? [6 Productive Ways]](https://waterheateradvisors.com/wp-content/uploads/2021/10/How-To-Clean-Sediment-From-Water-Lines-768x300.jpg)
